
How To Create Educational Video: A Step-By-Step Guide
Creating an educational video can feel intimidating—especially if you’ve never filmed anything before. I remember the first time I tried to teach a topic I knew well… and then watched the recording back. The content was fine, but the pacing was all over the place, my audio was a little muddy, and the visuals didn’t actually help people follow along. That’s what usually trips people up.
This step-by-step guide is how I’d build an educational video today: from nailing the learning goal to filming, editing, publishing, and then checking real performance data. And yes, I’ll include specifics you can copy—like a simple script template, a shot-list format, and a practical export checklist.
If you’re making micro-lessons, lab demos, or course-style lectures, the workflow below stays the same. The only thing that changes is how detailed your visuals and examples need to be. Let’s do this.
Key Takeaways (What Actually Moves the Needle)
- Define learning goals using SMART, but also write the deliverable (what learners can do at the end). Example: “By minute 10, learners can solve 5 basic equations with 80% accuracy.”
- Know your audience by listing what they already know and what confuses them. Then pick a tone and example style that matches (kid-friendly analogies vs. adult real-world scenarios).
- Select a topic that matches the gap you found. Don’t just choose what’s interesting—choose what’s missing and easy to explain in one sitting.
- Write a script that includes exact teaching moments: hook, explanation, worked example, quick recap, and a “try this” prompt. Keep sentences short and scannable.
- Plan visuals with intent (storyboard or shot list). For every key concept, decide: “Do I need a diagram, a screen recording, or a real-life B-roll clip?”
- Use the right audio setup—it matters more than you think. Aim for speech clarity first (mic placement, levels, and background noise control).
- Set up a distraction-free space and lock your camera height. Eye-level shots and a clean background instantly make you look more credible.
- Practice, then record with a structure (not just “wing it”). Do 2 takes for the hardest sections, and keep the rest moving.
- Capture relevant footage and label it while you shoot (A-roll, B-roll, screen captures). Your future self will thank you during editing.

1. Steps to Create an Educational Video
1.1 Define Your Learning Goals (Not Just “Teach X”)
Before you pick up a camera, I like to write the goal like I’m grading a quiz. What should learners be able to do after watching?
Here’s a SMART version you can steal:
- Specific: “Solve basic algebraic equations.”
- Measurable: “Correctly solve 5 equations out of 5.”
- Achievable: “Using only one-step equations.”
- Relevant: “For students who are stuck on simplifying.”
- Time-bound: “Within a 10–12 minute lesson.”
What I noticed after doing this for a few videos: my scripts got tighter. I stopped adding “extra helpful” tangents and started building lessons that actually matched the goal.
1.2 Choose Your Audience (And Match Their “Comfort Level”)
“Audience” sounds like a marketing term, but it’s really a production decision. If you teach beginners, you need slower pacing, simpler language, and more definitions. If you teach advanced learners, you can move faster and use more nuanced examples.
Do a quick audience snapshot:
- Who are they? (age range, role, skill level)
- What do they already know? (2–3 assumptions)
- What do they struggle with? (common misconceptions)
- What do they want? (outcome, not just topic)
Then write your first line to match. For example, for adult learners, I’d start with a real-life scenario (“If you’re budgeting…”). For students, I’d start with a simple question they can answer (“What’s the value of x when…”).
1.3 Select a Topic (Use a Simple “Gap Test”)
Instead of choosing the topic that sounds coolest, I use a gap test:
Is there something your audience can’t do yet? And can you explain it with one clear method?
Quick ways to find the gap:
- Check what people ask in comments or forums.
- Use Google Trends to see if the interest is rising.
- Look at top results for your keyword and spot what they skip.
Example: if you notice rising interest in online learning, a strong topic might be “How to study effectively for 30 minutes a day” instead of a broad “Online Study Tips.” Narrow topics usually perform better because they’re easier to follow.
1.4 Write a Script (Use a Template That Prevents Rambling)
Writing a script is where most people either overthink or skip. I’ve done both. Skipping leads to rambling. Overthinking leads to never recording.
Here’s a script template that works well for educational videos:
- 0:00–0:20 Hook: a problem, surprise, or quick promise.
- 0:20–1:00 Objective: “By the end, you’ll be able to…”
- 1:00–3:00 Concept: explain the idea in plain language.
- 3:00–7:00 Worked example: show steps slowly, narrate what you’re doing.
- 7:00–9:00 Common mistakes: “Here’s what people usually get wrong.”
- 9:00–11:00 Try it: give a short exercise and tell them what to look for.
- 11:00–12:00 Recap: 3 bullet takeaways.
If you want something even more practical, write your script in “lines” that match shots:
- Line 1: say the hook (talking head)
- Line 2: show diagram (screen graphic)
- Line 3: do the first step (screen capture)
- Line 4: show mistake (before/after visual)
That way, you’re not translating the idea into visuals during editing—you planned for it.
1.5 Plan Your Visuals (Storyboard With Shot IDs)
Visual planning is the difference between “informative” and “actually watchable.” I start with a storyboard that includes shot IDs like A1, A2, B1, etc.
A simple storyboard format:
- Shot ID: A1
- On-screen: talking head / diagram / screen recording / B-roll
- What you say: 1–2 sentences
- Duration: 5–20 seconds (shorter is usually better)
- Notes: “Add captions,” “Zoom on equation,” “Show cursor click”
Example idea for a math lesson: when you say “distribute the negative,” you show a red highlight moving across the expression. It’s not fancy. It’s just clear.
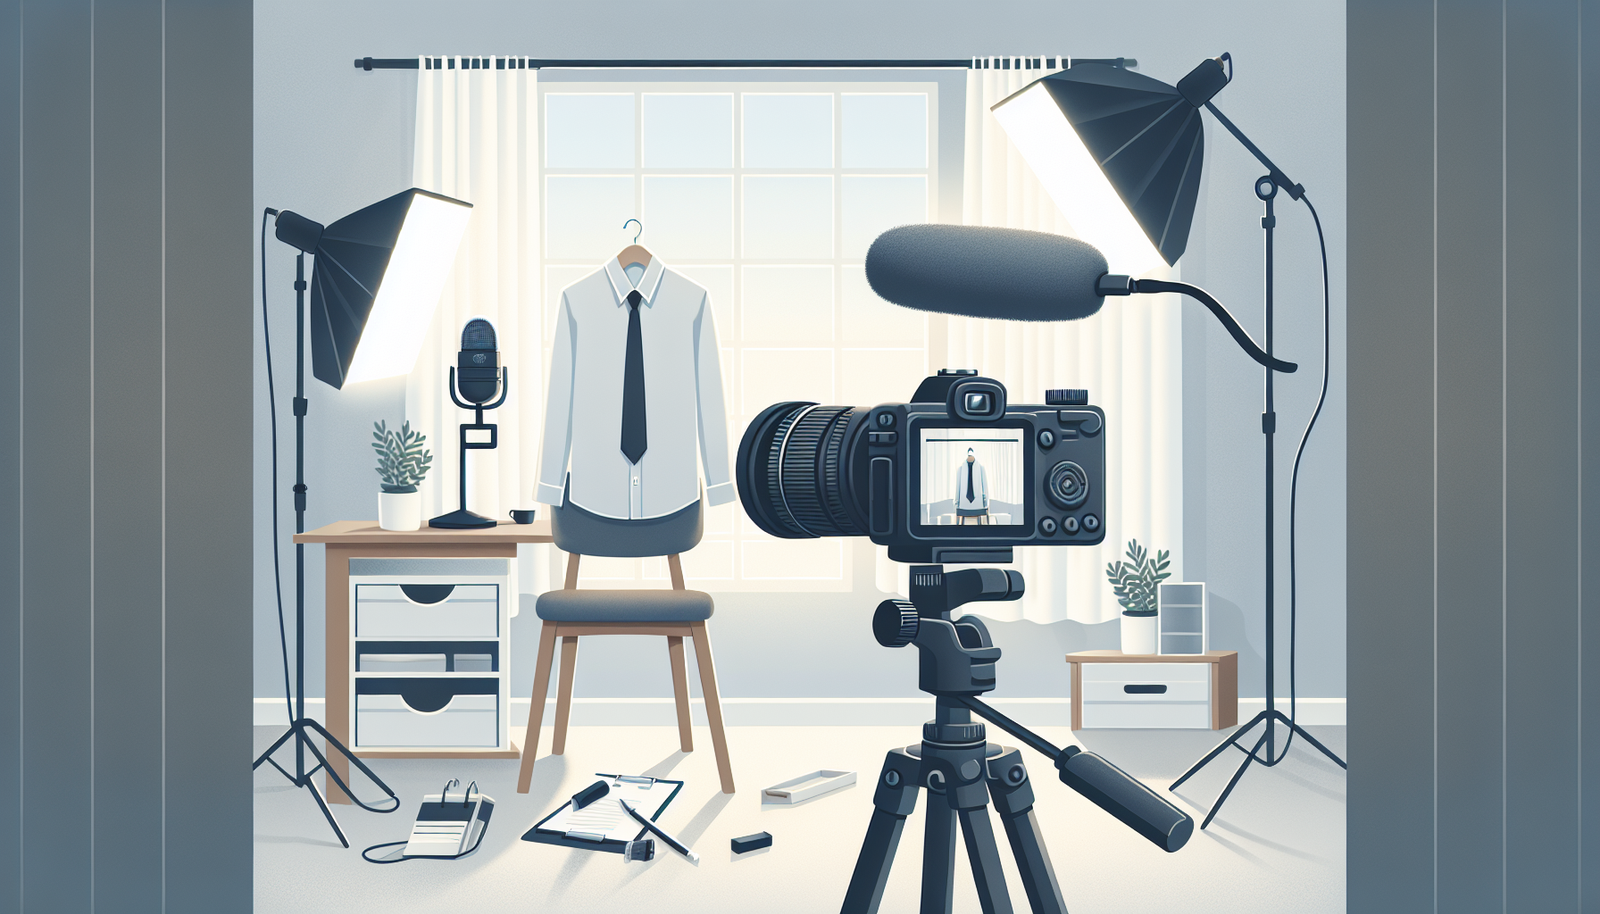
2. Tools and Equipment Needed
2.1 Camera Options (What Matters More Than Specs)
Yes, resolution matters. But in most educational videos, clarity and stability matter more.
In my experience, these setups work great:
- Smartphone: fine for talking head and screen recording (just stabilize it).
- Mirrorless/DSLR: great if you want cleaner depth of field and better low-light performance.
- Webcam + capture: underrated for tutorials if your lighting and audio are solid.
What I actually check before filming:
- Frame rate: shoot 30fps for most platforms (or 60fps for smoother motion if needed).
- Stabilization: use a tripod or gimbal—don’t rely on digital stabilization.
- Lens distance: avoid being too close (distortion happens fast).
And if you’re wondering whether 1080p is “enough”: for YouTube and most learning platforms, it’s still totally workable as long as your image is sharp and your audio is good.
2.2 Microphones for Clear Audio (The #1 Upgrade)
I’ll be blunt: people forgive average video. They won’t forgive unclear audio.
Here are mic choices and placement tips that have worked for me:
- Lavalier mic: clip it 6–10 inches (15–25 cm) from your mouth if possible, and keep it centered. If it’s too low or near your shirt collar, you’ll hear rubbing and muffling.
- Shotgun mic: use it with a consistent distance, usually 1–3 feet (30–90 cm). If you move around, the sound changes.
- Pop filter: use one if you’re getting “P” and “B” bursts. It’s a cheap fix that saves re-recording.
Audio level target: when you record, aim for peaks around -6 dB to -3 dB (if your software shows dB). If you’re constantly hitting 0 dB, you’ll hear distortion.
Also: do a 10-second test. Record, listen with headphones, and check for background noise (fans, AC hum, keyboard clicks). If you hear it on the test, you’ll hear it in the final.
2.3 Lighting Solutions (Get a Clean, Even Look)
Lighting is one of those things you don’t fully appreciate until you fix it. Then you can’t unsee the difference.
If you’re using natural light, position yourself so the light hits your face evenly—usually 45° to one side plus a reflector if you have one.
If you’re indoors, I recommend a basic 3-point setup:
- Key light: about 45° off to the side, slightly above eye level.
- Fill light: on the opposite side to reduce harsh shadows (lower power than the key).
- Back light (optional): helps separate you from the background.
Lighting ratios (simple rule): if your key light is “1,” set fill around “0.5” to “0.7.” You want shadows, but not harsh ones.
And yes, color temperature matters. Set your white balance once (don’t let the camera constantly “hunt”). A quick way to verify: film 10 seconds, then look at a white piece of paper in the frame. If it looks tinted blue or orange, adjust until it looks neutral.
2.4 Video Editing Software (Choose Based on Your Workflow)
Editing is where you decide whether your video feels smooth or frustrating.
For beginners, I usually suggest:
- iMovie (Mac) for quick cuts, basic transitions, and adding titles.
- OpenShot for cross-platform editing and simple timelines.
If you’re doing more serious educational content (captions, zooms, screen recordings, color consistency), these are solid:
Before you export anything, I recommend you build a repeatable editing checklist:
- Trim: remove long pauses and filler words
- Captions: add them (even auto-captions need a quick proof)
- Chapters: add markers at each concept section
- Audio: normalize volume and fix any clipping
- Visual emphasis: zoom or highlight during key steps
Platform export tip (YouTube): export H.264, MP4, 1080p, and a bitrate around 8–12 Mbps for typical videos. If you’re unsure, export a high-quality preset, then upload and check playback quality.
3. Filming Your Educational Video
3.1 Set Up Your Filming Space (Make It Easy to Shoot)
Your filming environment affects both quality and your sanity.
I aim for:
- Quiet: no HVAC noise if you can avoid it
- Clean background: plain wall or simple backdrop
- Good light: face evenly lit, not just “bright room”
- Stable camera: tripod or fixed mount
Eye-level shots are a cheat code. If your camera is too high or too low, it changes how people “feel” about you. It’s subtle, but it matters.
Also, declutter. If there’s a messy bookshelf behind you, viewers focus on it more than your lesson. Trust me.
3.2 Tips for On-Camera Presentations (Pacing Beats Performance)
I used to think I needed to sound perfect. Nope. Educational videos need clarity.
What works for me:
- Practice out loud once, then record.
- Use shorter sentences than you’d normally write. Talking is different.
- Eye contact: look at the lens, not the screen.
- Gestures: keep them purposeful—one gesture per key point.
- Smile early: it makes the first 5 seconds feel less stiff.
One more thing: if you mess up, don’t panic. Mark the spot in your mind and keep going. You can cut it later.
3.3 Capturing Relevant Footage (A-Roll, B-Roll, and Screen Shots)
Relevance is everything. If the footage doesn’t help the learner understand, cut it.
When I shoot, I label footage as I go:
- A-roll: you speaking
- B-roll: experiments, tools, examples, real-life footage
- Screen capture: diagrams, slides, software steps
Example: in a science or tech lesson, B-roll should show the “thing you’re describing,” not just random visuals. If you’re explaining a lab procedure, film the setup, the step-by-step action, and the result.
For steady shots, use a tripod. If you don’t have one, use any stable surface and avoid quick pans. Educational content doesn’t need cinematic camera moves—it needs readability.

5. Publishing Your Educational Video
5.1 Choosing a Platform (Pick Where Your Learners Already Are)
Publishing isn’t just “upload and hope.” It’s choosing the right room for your content.
My default choices:
- YouTube: best for search-based learning and long-form lessons.
- Vimeo: great if you care about a polished, creative presentation and a more curated audience.
If your audience is more professional, LinkedIn can work better—especially for short explainers and workflow-based education. And don’t be afraid to cross-post, as long as you adapt the thumbnail/title style to match each platform’s vibe.
5.2 Writing an Engaging Description (Make It Scannable)
Your description should work like a trailer. People should know what they’ll learn within seconds.
I usually structure it like this:
- First 2 lines: hook + what they’ll learn
- Short summary: 2–3 sentences
- Keywords naturally: include your main topic phrase once or twice
- Timestamps: for anything over ~8 minutes
- CTA: ask a question or point to related resources
And please don’t keyword-stuff. It reads badly. Instead, write like a person who wants to help.
5.3 Using Effective Tags and Keywords (Test, Don’t Guess)
Tags and keywords help, but they’re not magic. What I’ve seen work best is choosing a clear primary keyword and a few supporting terms.
Practical approach:
- Use Google Trends or Keyword Planner to find what people are actually searching.
- Pick a primary phrase (example: “how to write educational video script”).
- Add 5–10 related tags that match the lesson type (tutorial, lesson plan, storyboard, captions, screen recording).
Then track performance and adjust for the next upload. If your retention drops early, tags won’t fix it. The lesson itself needs clarity.
6. Promoting Your Educational Video
6.1 Share on Social Media (Use Teasers That Teach a Little)
Social sharing shouldn’t be “here’s my video.” It should be “here’s what you’ll get.”
I like to create a few teaser clips:
- A quick 5–10 second moment where the concept clicks
- A before/after visual (messy vs. corrected result)
- A short “mistake” clip (“Here’s what not to do…”)
Use platform features like Stories or Groups to start conversations, not just post links. And yes, hashtags help—use them strategically and keep them relevant.
6.2 Engage With Your Audience (Turn Comments Into Your Next Script)
Engagement is where educational channels grow. People don’t just watch—they ask questions.
Here’s what I do:
- Reply to comments with actual answers, not “thanks!”
- Pin a comment that asks viewers to try a small step (a mini-challenge)
- Collect recurring questions and turn them into future episodes
Also consider live Q&A. When viewers ask in real time, you get instant clarity on what’s confusing.
6.3 Collaborate With Others (Borrow Trust, Then Deliver Value)
Collabs work because they bring new audiences and fresh examples.
What I look for:
- Creators who teach adjacent topics (same audience, different angle)
- Educators who can provide credible demonstrations
- Communities where your topic fits naturally
Collaboration ideas that fit educational content:
- Joint video series (“Part 1/Part 2” lessons)
- Interview format with a clear learning objective
- Co-hosted webinar where each person covers a section of the curriculum
It’s not just reach—it’s also better learning. Different explanations help more people understand.
7. Evaluating the Impact of Your Video
7.1 Analyze Viewer Feedback (Look for Patterns, Not One-Off Notes)
Feedback is gold, but only if you process it.
When you read comments, categorize them:
- Confusing parts: “I didn’t get step 3”
- Helpful parts: “The example made it click”
- Production issues: “Audio was quiet” or “captions were off”
- Content requests: “Can you explain this with another scenario?”
Then use that to adjust your next video outline. After a few iterations, your audience stops asking the same questions because you’re meeting them where they are.
7.2 Track View Counts and Engagement Metrics (Use Them to Debug)
View count is vanity if you don’t look at engagement. I check three things first:
- Watch time / average view duration: Are people sticking around?
- Audience retention (YouTube): Where do they drop?
- Engagement signals: likes, comments, shares, saves
Also check traffic sources. If most viewers come from search, your title/description matters. If they come from social, your thumbnail and first 10 seconds matter.
If you use Google Analytics, track which pages or campaigns send visitors and whether they convert into watch time (not just clicks).
7.3 Make Improvements for Future Videos (Turn Results Into a Plan)
I keep a “lessons learned” list after every edit. It’s usually short, but it prevents repeating mistakes.
Here’s a simple post-mortem template:
- What worked: (example: “worked example at 3:30 increased retention”)
- What didn’t: (example: “people dropped at the long explanation section”)
- Change for next time: (example: “split that section into two shorter clips and add a visual diagram”)
- Production fix: (example: “increase key light power by 20% and re-record audio”)
And don’t ignore trends. If viewers respond to a certain format (like “mistakes to avoid” or “worked example first”), lean into it—without sacrificing clarity.
Quick real-world example from my workflow: I once recorded a 12-minute explainer with a lot of talking and minimal visuals. The audio was okay, but retention was weak. After reviewing analytics, I found the biggest drop happened around the worked example. So I rebuilt the storyboard to include step-by-step highlights, added captions, and zoomed in during each calculation. Same core content—better visuals and pacing. The next upload kept viewers longer through the “hard part,” and comments shifted from “I don’t get it” to “This example helped.” That’s the kind of improvement you can measure.
FAQs
The core steps are: define your learning goals, choose your audience, pick a focused topic, write a script, plan visuals, film, edit, publish, promote, and then evaluate the results so you can improve the next video.
You can start with a smartphone or a camera, a reliable microphone (lav or shotgun depending on your setup), proper lighting (even simple soft light works), and editing software like iMovie, OpenShot, Premiere Pro, or DaVinci Resolve.
Share it on social media with teaser clips, engage in the comments quickly, ask viewers questions to spark discussion, and collaborate with other creators in your niche to reach new learners.
Choose the right platform (YouTube, Vimeo, or LinkedIn depending on your audience), write a clear description with timestamps if needed, and use relevant keywords/tags you found during topic research. Then double-check your thumbnail and title for clarity and search intent.